Showing posts with label Paper. Show all posts

Saturday, April 2, 2016

DIY Collage Planet

I did some collage work today, for the first time in such a long time, and it was so fun! And what started out as just playing with strips of paper and scissors become something that I actually really like! I thought it would be something abstract and oceanic, just some meditative cutting and gluing. But once I trimmed the edges and stood back it became a planet! It made me kind if miss my Fiddleheads For Fiona Etsy shop, because I think other people might like it too. So since I can't post this there, I'll post it here.
And since I won't be selling these guys, at least not anytime soon, I'll just tell you all how to make them instead. All it takes is a round base of some kind, a plain old glue stick, some paper, and some scissors. And if you have an exacto knife and a cutting mat that would probably help at the end, but scissors would probably work. For a base I used this, and I get decorative papers from here, but there are lots of sources.

Just choose some papers you like the look of together, cut them into strips, and glue them down in layers. Then trim around the edge of your circle with a knife or a pair of scissors to trim the papers that are hanging over.  If you do have the cutting mat, flip your planet face down and cut around your base. Otherwise, just do your best with scissors.
I always forget, but really should always remember, that it is so creatively renewing and restorative to work in another medium for a change. As I sat staring vacantly at my Instagram feed in the middle of the day, for the millionth time, I realized that I desperately needed to put my phone down and do something before my brain turned to mush! And I'm so glad I did.

Friday, October 17, 2014

River Luna Art

My new prints from River Luna, in the great hanging frame TH bought me at the Pear Tree.  I am so pleased.

Tuesday, February 4, 2014

Paper Mosaic Collage: A Kid Friendly Art Project

I've had this idea stewing around in my head for some time now, and I finally got a chance to try it out.  Emmett can sometimes be hard to rope into craft projects because he gets frustrated easily if things are too hard or finicky.  But this project includes some super kid friendly tasks, even preschool friendly, like paper snipping and glue sticking.  It also includes some things that an adult or older child will need to do too, so it is a great group project.  

Here is what you will need: 
1) Some large thin white paper, like children's easel paper, or butcher paper
2) Various papers to make up the body of your collage, such as wrapping paper, decorative paper, scrapbooking paper, or whatever you choose.
3) Something to mount your collage on, such as this wooden art board, poster board, foam board, or whatever you have access too. (click on the link above to see where mine came from)
4) Something to use as your background, if you want one.  I used book pages, but you could paint the background, or use whatever appeals to you.
4) A pencil
5) Gluesticks
6) Kids scissors
7) Good grown up scissors, or an exacto knife and cutting mat.
The first step is to get the kid or kids snipping paper into small pieces into a bowl.  I found that Emmett had an easier time with this if I first cut the papers into long strips for him, and then he could easily snip them into something like squares.  There is no need for them to be a uniform size or shape.
And while he was busy snipping I pulled up some images of whales on Google images to use as a basis for our whale shape.  In hindsight it would have been a better idea to do this in advance.  Especially if you will be working with more than one kid.  Emmett and I together decided that the image below both appealed to him and fit well on the mounting board we had on hand.
So I sketched out the outline of this humpback whale on a piece of paper I snagged from Emmett's easel.  The paper (and the outline drawing) must be the size of the design you will want to end up with on your final collage.  You want the drawing to be as detailed as you can, although the outline is all you need, so you don't end up with an unrecognizable blob, so pay attention to the silhouette and make sure it is clearly the animal you are trying to make. 
Then you want to flip the paper over and make a more vague outline that surrounds your whole design.  This is the side you will glue the paper scraps too, and you want to make sure that they will cover every inch of the design on the other side.  This sounds really confusing, and is a little hard to describe, but it is very easy to do.  The next photo will hopefully give you a better idea what I am saying.
See how the outer line is less detailed but contains the whole more detailed silhouette within its borders?  That's what you want.  Now you are ready to start gluing, and hopefully the kiddos have lots of snipped paper scraps in their bowl. 
Make sure you have the larger, more amorphous side up, and let your little gluers get to work.  They can work as methodically or as willy nilly as they want, it will look cool either way.  I have some of the purple glue sticks which are great for kids because they can see where they have put the glue, and yet it still dries clear.
And just keep adding and adding paper scraps until you cover up all of the white paper up to the edges of your pencil border.  It's ok if there are overlapping papers, in fact, there will need to be, so don't worry too much about lining anything up.  Emmett got a little bored before all of the last little bits of white were covered, so I finished it up for him by filling in all of the tiny remaining gaps and then adding more glue to any of the scraps that weren't securely glued.
 When this stage is all done it will look like this. (above)
Once the glue has dried, or mostly dried, you flip over your paper, revealing the more exact drawing on the flip side, and get ready to cut it out, either with good sharp scissors or an exacto knife and cutting mat. Cut slowly, being sure to cut through all of the layers of glued paper scraps.
And now the fun part! You flip it over and see the mosaic pattern animal silhouette with nice clean edges:
And now for the background.
I could have just given Emmett a whole bunch of blue paints and let him go at it on the wood panel. That would have probably looked really cool too.
But since Emmett's attention was waning, and book pages are kind of my thing, and I knew I happened to have some pages from an old copy of The Old Man and the Sea lying around, I decided to go that way instead.
Now just slather the back of your whale (or other animal) with glue stick, flip it over and place it on your background and press down all the edges firmly.
The wood panel I used was from Dick Blick, and they come in loads of sizes.  The added bonus of using a wood panel is that you can attach a picture hanger right on the back of it and you don't have to worry about either finding a frame, or figuring out how you are going to get it to hang on the wall.
And you're done!  Emmett is 4, so by the end of this project I was pretty much working on it alone. And this is also a pretty big piece. But I bet with 7 or 8 year olds they would be able to see it through all the way to the end, as well as be able to take on a lot of the aspects that I did, like the background and cutting out the final silhouette.

Have fun!


Friday, September 13, 2013

Autumn at Fiddleheads For Fiona

I'm shipping out this lovely set of teal pieces today, and I just had to take a picture of them all together.  I love seeing how customers choose to put together little collections.  And while I am here, showing off these four cuties, I figured it is a good time to give you all a little peek into what in new right now in the FFF shop.

And of course there are lots more new designs as well, so if it's been a while, click here to head on over to the shop and take a look! 

Friday, March 1, 2013

New Work

I've been taking advantage of a little bit of down time to by finally creating some new designs that have been floating around in my head for a while now.  It has been a really nice break from all of the jewelry making, and I love it when there are lots of new designs in my Etsy shop!  It is also almost therapeutic to work with all of the bright patterns and colors while surrounded by an oppressively muted palette of grey, white and brown.  March really is the ugliest month around here.  Sorry Vermont, but you know it's true.  Here's a little preview of the new work:
 If you are interested in seeing additional photos and details on these pieces, or to see a few additional new pieces, click here to head to the shop.


Friday, August 24, 2012

Bird Blocks and the Picnic Music and Arts Festival

Here are the bird blocks I mentioned in my previous post.  (I just posted them, so click here to see them in the shop.) I'm really excited about the way they turned out, and now I have a whole slew of new ideas in the same vein.  I'm thinking of a farm animal blocks set, and a woodland creatures set, maybe an ocean dweller set.  Maybe a halloween themed set, and a Christmas set for holiday decorating. The sky is the limit!
And now I'm off to Portland for Picnic.  It is on Saturday from 11-6pm.  Click here for additional pertinent information.  I hope to see at least a couple of you there!

Wednesday, August 22, 2012

New Fiddleheads Work for Portland

I am headed to another show this weekend, this time in Portland, Maine.  This is a one day show on Saturday the 25th called Picnic, which will have food vendors and music and crafts, in Lincoln Park from 11-6.  I am bringing Fiddleheads work and jewelry to this show, so I finally made the time to get back into the collage studio and make some new work.  I wanted  to make some ocean themed pieces, since the show is on the coast, and I've been trying to bring some additional movement and perspective into my collages, and ocean scenes seemed an easy way to start.  I'm really happy with the whale ones especially, and I'm working on some fun color block sea birds as well.  Those aren't quite finished yet, but here are a few whales:
The first two images are already available in the Fiddleheads Shop, and the third will be up later today, along with a bunch of other fall and ocean themed pieces.  And if you are in the Portland (Maine) area, or know anyone who is, please send them along to walk through the show!  It is free to enter, and there will be lots of beautiful handmade goodies to look at.  And what a great way to get a jumpstart on your holiday shopping with some artisan made work.  Think about how good you'd feel to get ahead of the game with some thoughtful handmade work packed up in your closet patiently waiting for the holiday insanity!

Thursday, June 14, 2012

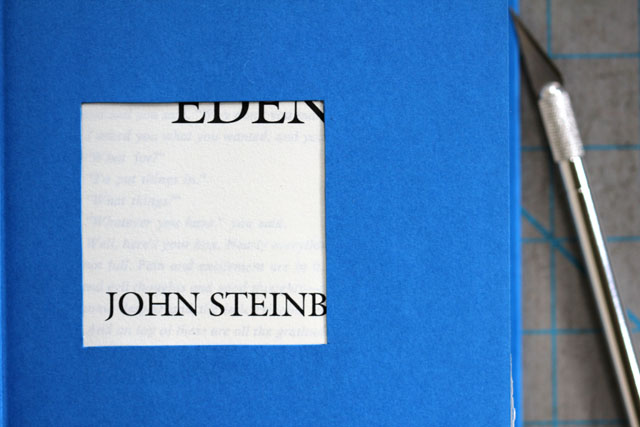
An Engagement Ring Box Made From East of Eden

I love the way this custom engagement ring presentation box came out with the beautiful blue inside cover.  Plus it is so fun to be involved in someone's engagement, even in this small way! 

Thursday, March 1, 2012

Studio Sneak Peek - Works on Paper, Paper Conservation

The other day my friend Carolyn asked me to come in and take some photographs of her at work to be used to help explain to people what she does.  As a paper conservator, her job is pretty unusual, and not something that most people know a lot about, but it is so interesting that she is constantly fielding questions.  So she is building some informational panels to hang in her studio to help people get a sense of what she does.  I had a great time getting to see some of the many the beautiful projects she is working on, as well as getting a better understanding of the various processes she uses.  Below is a little insert of in-painting, cleaning, tape-removal, and tear-mending. And then a little further below you can see a butterfly print being pulled out of a bath, and a print being humidified in a plastic tub covered with plexiglass. 
If you want to get more information about Carolyn and what she does at Works on Paper, please click here.  I really enjoyed my little peak into Carolyn's studio, and some of the interesting work she does there.  And I think it is so cool that she has been able to make a successful business out of it in rural Vermont.  I am always so interested to find out how people make a go of it up here, where there is really very little industry to participate in, and few 9-5 jobs to be had.  Thanks so much for the fascinating tour Carolyn!